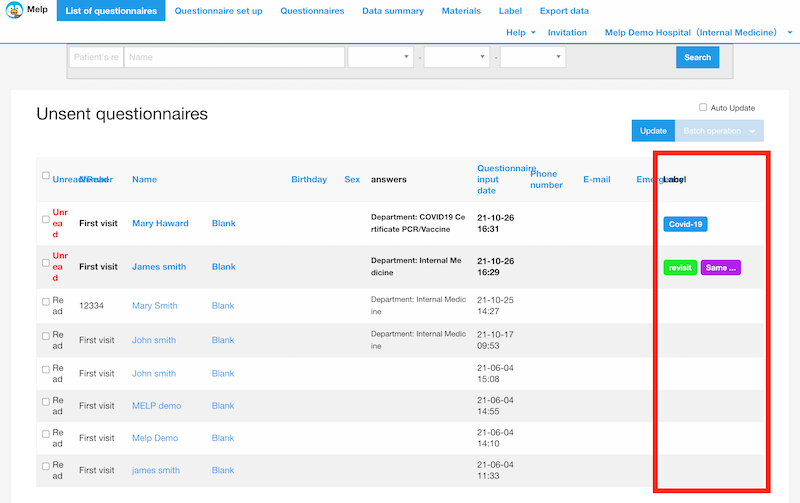
In this article, we will explaiin how to use the label function.
By utilizing the label function, you can see with a single glance what kind of patients are coming to the clinic on the consultation list screen.
Creating labels
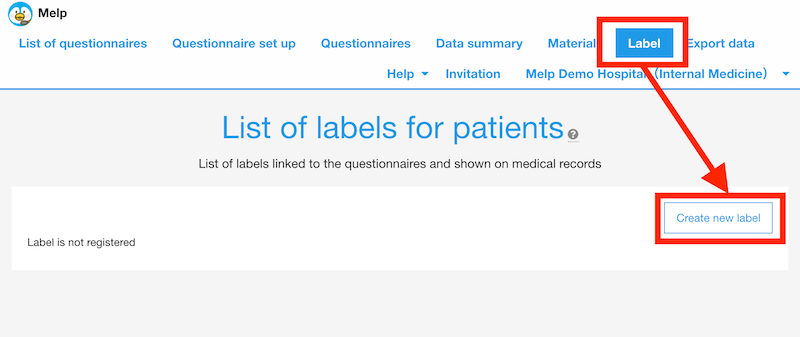
In the header, click on the Label tab to open the label management screen, and click on "Create new label" to create a new label.

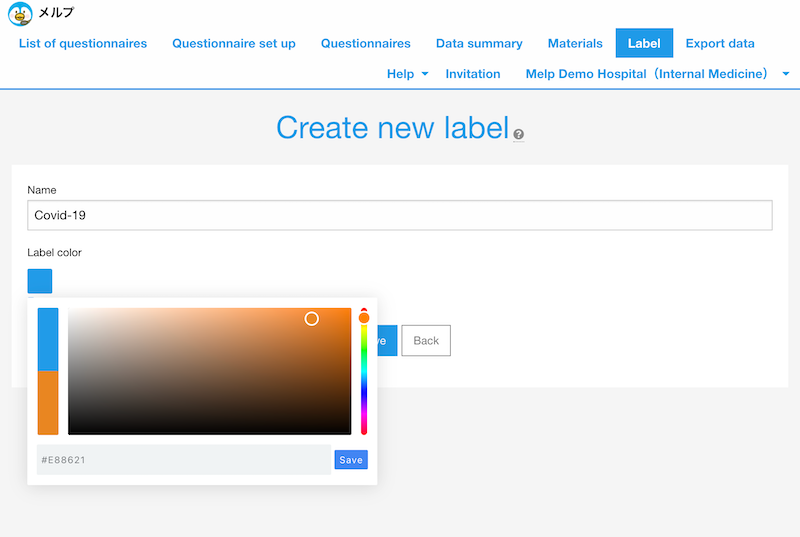
Select a label name and a background color for the label. The background color can be selected from the color palette or set by entering the color code directly.

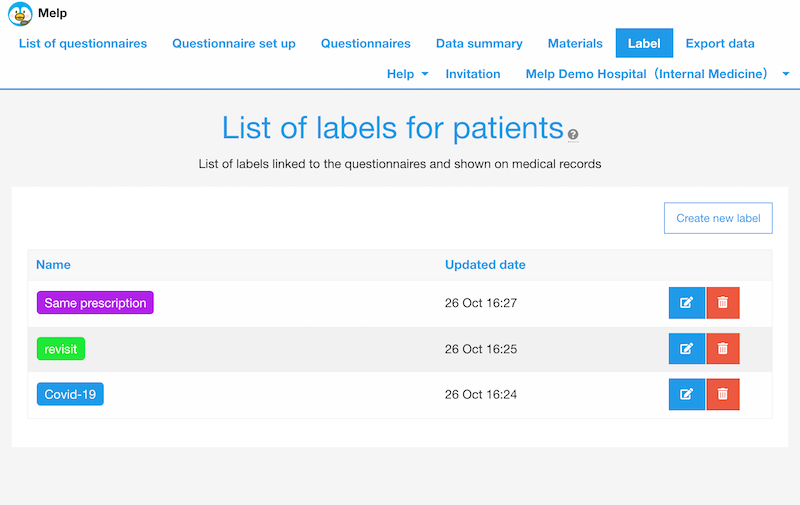
Multiple labels can be created as shown below.

Link labels to answer choices.
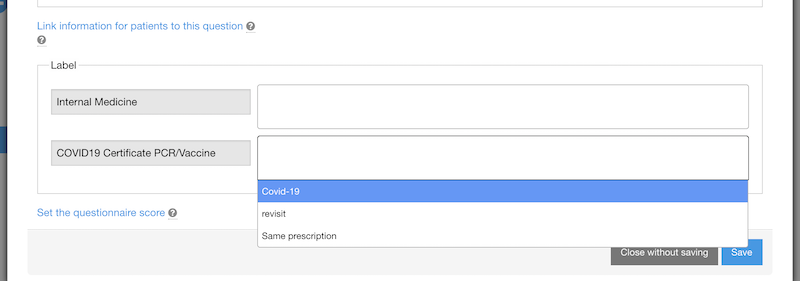
Next, connect the label you created to the corresponding answer choice.
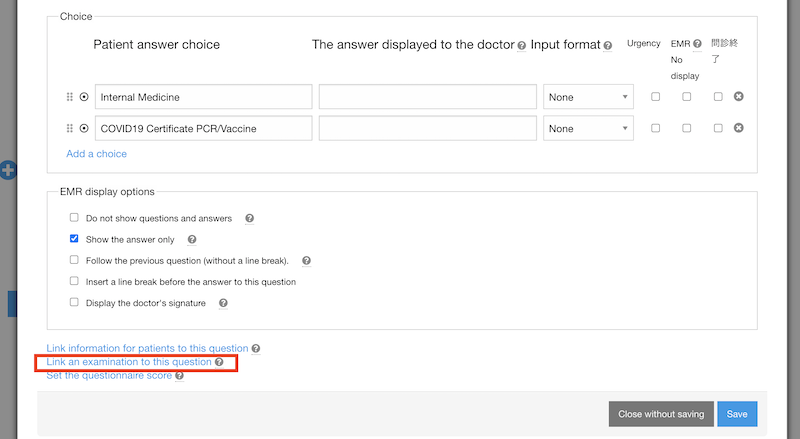
Click "Link an examination to this question" on the Create Questionnaire screen.

When the answer choices are displayed, select the label you want to associate from the pull-down menu. You can attach more than one label to a single answer choice on any given day.

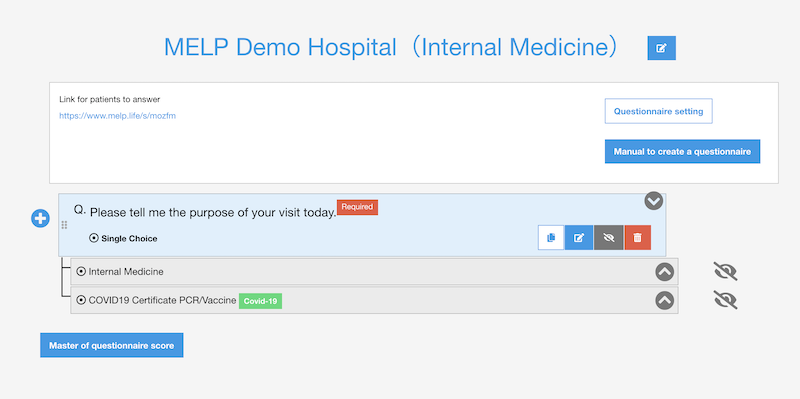
The associated label will appear next to the answer choices with a green background.

Check the label.
Patients who select answers associated with a label will see the label in the question and answer list screen.
